Drawing the Garden Plan
Now we are ready to develop a hardworking, functional garden plan that you will enjoy living in for many years to come!
You should have studied your site and its’ key characteristics.
You’ve understood such things as how the light plays upon the property, its soil composition, drainage conditions and access points.
You know which direction is north, south, east and west, and you have identified the most important garden features that you want incorporated into your new design.
Now you are ready! It’s time to begin the first phase of your new garden layout.
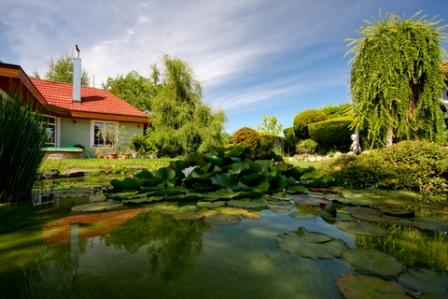
If you have been following along with the site assessment process as it has been presented so far, you may have already begun working on this phase! You may have begun drawing the bubble diagram, and are therefore well down this path.
You will also have the notes that you have taken about your most important impressions and strongest interests for the new garden space. You will use the notes you have taken and the bubble plan you have begun and begin drawing in earnest!
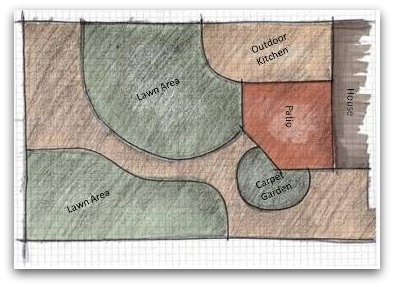
In our earlier conversations about the site assessment, I suggested that you may want to begin setting up a bubble plan. This is the beginning of your functional diagram, and it is your first attempt at organizing your new garden space. The bubble plan, or functional diagram, documents your thoughts and ideas about where to place the major functional areas in your garden.
Going through this process on paper allows you to play with many possibilities, with very little significant effort beyond drawing. It gives you a tool to use to check the garden plan against your answers from the assessment reviews you have completed and recorded in your garden notebook.
Your final garden plan will include these functional areas in the end. By creating a series of bubble diagrams with many different options considered, you will begin to see the true site potential. As you are laying out these functional areas as bubbles on your garden plan, label them with the functions they will serve in your design.
Create several alternative options on a series of overleaf pages, and select only the best. I would suggest that you attempt at least 4 to 8 different garden configurations, even if it strains your brain a bit! This is setting the direction of your future contentment!
The single most important consideration at this stage of your design process is the relationship of the various drawn spaces to the house and to the other functional areas in your projected organizational scheme. Ensure that areas that may create potential hazards or other potential conflicts have been placed in a way that will mitigate these issues. An example might be locating your pool next to the children’s play area which might present a safety concern. If you feel you must leave these two areas adjacent to one another, have some ideas about how to mitigate safety hazards prior to committing to that organizational plan.
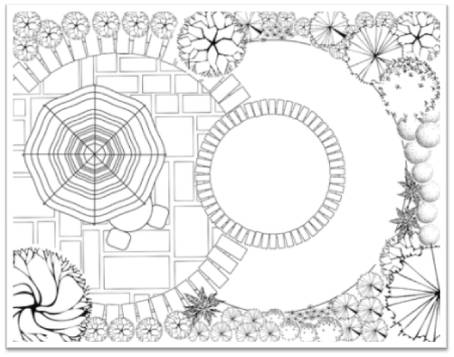
Spatial Composition and Planning a Garden
Once you have selected a couple of good options as the basis for your new garden plan, you will take your final two or three functional diagrams and begin to refine the lines on those plans. This can be done directly on the same overleaf, or if you think you will want to explore two or three options for each base functional diagram, then do these also on another overleaf page.
Shape the new spaces by straightening lines and drawing in shapes as curves or squares or rectangles. You are shaping the major lines of the new garden plan now. At this point you can begin drawing in lines for the various flower or vegetables gardens, patios, access points and garden boundaries.
As you go through this process there are several considerations that can be folded into your thinking to help with developing your new vision. By addressing each of these as you think through your garden plan, you are working out the kinks in your organizational plan and beginning to articulate the new vision.
Be creative! Don’t draw a bunch of square or rectangular areas unless they genuinely serve as the best solution for the space. Think through some of the following concepts to help you conceive of bold new ideas for the basic lines and shapes in your two dimensional view of the garden plan.
Formal or Informal Garden Plans

Determine now which general garden style you are most interested in. Do you like formal, stately, symmetrically balanced garden areas the best? Are you the free spirited type, who loves an informal feel and restful spaces?
Or do you like a blend between the two? No matter what basic style you end up choosing, it will generally be a refined version of one of these three solutions.
Two Dimensional Garden Plan and Garden Orientation
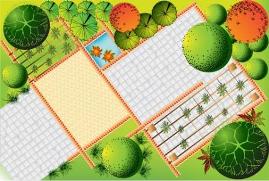
Play with the layout of the entire garden space. Look at the garden as whole in the two dimensional view. What does the overall garden shape, without any manipulation, suggest to you? Is it a squat, square shape, an elongated rectangle, or a wedge shaped appendage to the house?
There are several garden orientation methods or ideas that may be used to step things up a notch.
The typical square or rectangle shape need not rule in your garden!
When you start with good lines in your garden, it helps ensure that you will end up with a superior design. Just re-orienting the space with a surprising or dynamic treatment can enliven the garden with very little additional effort!
Odd Shaped Garden Plans
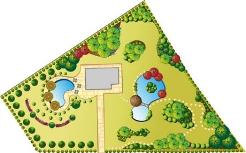
Garden orientation techniques work extremely well in an odd shaped garden. Does your garden wrap around the house in an L shape? Is it long and narrow, leading your eye
straight to the back fence where there is a train track running just behind the house?
Use these orientation ideas to stand your garden on its ear! You can manipulate the eye easily with this sort of treatment.
Using repeated forms throughout the garden tends to create a sense of unity, even in these odd shaped spaces. Repeating basic lines or shapes throughout the garden in an overlapping, or even a surprisingly off kilter way, can help to bring a garden together. It can help to visually conceal some areas and create garden “rooms” where treatment of the garden space can be more independent, without destroying the unity of the entire garden space.
Draw your lines on the bubble plan to capture your ideas. Use your creative juices to come up with some unique and different ideas that are totally YOU, and respect the basic design principles we’ve discussed before.
Necessity is the mother of invention! If you are faced with one of these awkward situtations, don’t give up. Many very beautiful and enchanting spaces have been created through an attempt to disguise, manipulate, or make a focal area out of an awkward situation.
Three Dimensions in Your Garden Plan

Now that you have your basic two dimensional spaces understood, you’ll get to exercise your brain in a new and different fashion! You will not do too much of this thinking at this stage, but as you continue through the process of drawing your garden plan, you’ll need to think more
and more along the three dimensional lines. But take your first foray into this 3D world at this stage while you are organizing the garden spaces.
Look at your two dimensional view of the garden plan. If you were walking through it and seeing it in 3D, what might it look like? As you walk from the front driveway to the house, what do you see? Is it obvious where the front door will be located? Or have you “hidden” it from view? Once the area next to the door is planted, will it obscure those important visual clues? If so, can that be mitigated, or does it drive a change to the organization of the front spaces?
These three dimensional considerations are very important to understand at a basic level right here at the origin of your final garden plan. They may cause you to rethink a portion of your functional plan in order to cope with what you learn as you test your garden plan this way.
Do this reality check while you are laying out your garden on paper! It’s a LOT less expensive that way, and doing so can save you a very complex garden revision later.
Adding the Hardscape to your Garden Plan
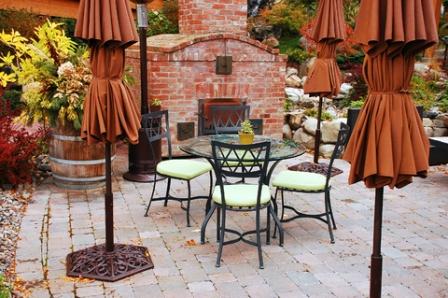
With this step, you are beginning to really set the design style of your garden. Hardscapes are an extremely important element in the garden for several reasons. Hardscape areas can set the backbone and basic shape of the garden. Design of the hard surfaces in your garden can also provide a fertile opportunity for ornament in your garden, so it is worth spending time and money on getting the hardscape right! It will be around for a long time.
So what IS Hardscape?
Webster defines hardscape as “structures (as fountains, benches, or gazebos) that are incorporated into a landscape”. Another definition is “The part of a building’s grounds consisting of structures, such as patios, retaining walls, and walkways, made with hard materials.”
Hardscape Design does incorporate much more than paths and patios, though these are the most common uses of hardscape in a garden setting.
What you are going to be imagining now, in relation to your garden plan, is how these “hard elements” of your garden will need to be laid out to support the decisions you have already made regarding garden orientation, style, and garden layout.
These hard surfaces may consist of patios, paved surfaces, edgings, walls and archways, garden boundaries, wall fountains, bridges, pools, gates, terraces and raised beds. These items do not all have to be located or finalized at this time, however those that have a major impact on placement of other elements of the garden, such as driveways, patios, pools, and terracing, must be developed at this time. Larger hardscape elements greatly affect the placement of garden beds, plantings, and other soft and hard elements of the garden.
Depending upon the decisions you have made about using an informal or formal garden style, these areas may also take up a substantial portion of your new garden plan.
These hardscape surfaces help to shape the skeleton of the garden, and they work best if their dimensions are generous and the details of these surfaces are highly attractive.
It may help you to remember why hardscape elements are important in the garden.
They are valuable because they:
- Create a place for people to live in the garden
- Provide a means of movement in the garden and facilitate access
- Help to provide garden interest and structure during the winter months
- May help create a low maintenance garden
- Integrate the house and garden spaces
As you design these larger hard surfaces, keep these major elements in mind, and try to ensure that the shapes and lines you create in your two dimensional garden plan are accomplishing these important goals. If they are not, do you really want or need these? Hard surfaces can be expensive to install, so make sure they are hardworking either functionally or aesthetically before including them in your garden plan.
The Preliminary Design and Plant Selection
Working through the ideas above, you will begin to shape your new garden plan, bubble by bubble, until you have generated the basis for what is often called a preliminary design plan. Your preliminary design plan captures the best of all of the ideas generated from the work you have done up until this point. You will add the major features of your new garden to your functional diagrams, and this will provide the basis for a working plan that is representative of what you believe you want in your new space.
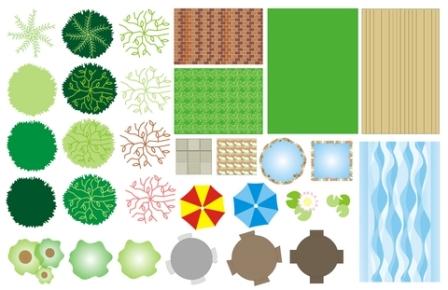
You are now beginning the final steps of the design process, where you will formalize your garden plan by adding standard landscape symbols like those pictured above for plants and objects on your basic plan. Take the time now to formally draw out the complete preliminary design plan and include these plant features as you work through the new drawing.
Do not forget to incorporate the original site survey information that you intend to bring forward into your new plan, and begin to clean up the prior work you have done by setting all the major shapes, features, and lines that you have generated on your functional plan into the new drawing. This will give you a clean working copy of a near finished plan that will allow you to more easily discern the details. This new drawing is called your preliminary design drawing.
Now your job is to refine the preliminary design by selecting plant forms, shapes, and sizes. You will be setting standardized symbols for these items into your newly designed garden framework.
Select from the set of standard symbols like those above to represent these forms. A professional designer would draw representative symbols for the mature shapes, sizes, and forms that will be needed to fill in an area with plant materials. This standardization of symbols helps to add intelligence to your plan, allowing you to tell at a glance what sort of plant is needed in a space when you later begin to select plant material to fill these spaces.
You do not need to identify the actual plants by name at this time. You are working now with the garden plan to populate it with plant forms and shapes that will round out both your two dimensional and three dimensional views of the garden.
Labeling each plant form using broad terms such as conifer, deciduous tree, or evergreen shrub is sufficient for the moment. For garden areas, you may label the whole area as “perennial garden” or “vegetable garden”. You will select the plants to place in these locations in your next step. Of course, if you know what plant you want feel free to add these labels at this time.
Work through the garden plan from functional bubble to functional bubble, adding this detail as you progress. Start with the tallest and largest plants for a given area. Position your standard symbols on the preliminary design plan, and begin to fill in the plant forms and shapes around them. These larger plants will often set the tone for the garden bed or general space, so they should be considered as all other plants are placed.
Taller plants are often best placed at the back of a border, with mid height plants placed near them, and smaller or lower height plants are generally used toward the front of a border or garden area. This creates a sense of depth within the garden.
However, when placing plant symbols, do not place them rigidly in lines of various heights one in front of one another, as this leads to a very stiff and static picture. Vary the mid-height and lower plants in larger and smaller drifts that extend to the back of the bed
and use a few taller plants that extend into the middle of the bed, varying these treatments along the length of a garden border.
This mimics nature more closely and is much more restful and interesting to view.
Large drifts of lower growing plants are opportunities for real impact in a garden area, so don’t hesitate to vary the garden spaces and include these drifts, but always keep the concept of unity in mind as you do this. You are looking for a design with enough unified ideas to create an overall impression of order, while your design preserves the needed variety to make the garden interesting to the viewer and pleasant to wander.
At this preliminary stage, your plan can be fairly crude. The beauty of paper garden design is that changes are easily made and detail can be added as late as the actual purchase of plants at the nursery! This drawing is meant only to record your decisions as to form and function. It is not a prescription for a garden space. You are guiding your mind toward those more detailed decisions with every iteration through the garden space.
Ensure that you do not compromise the function of each garden space as you adjust and manipulate the plants and objects. Aesthetics can be added to a functional area, but function is less easily added back into the garden space if ignored during the design phase.
Pay very close attention to the three dimensional views of these spaces as you work through this phase. Mentally walk the garden, always reviewing how a particular shape or form will impact the viewer who is moving through the space. Will it overwhelm? Is it too diminutive to balance the view? Is there enough space to move around through the garden?
Adjust, correct, review and adjust again, until you believe you have reached a point that the garden spaces will feel complete and balanced. Keep in mind the elements and principles of design as you move through this thought process. Look for opportunities to bring each of these basic principles into your design.

The Final Garden Plan- Selecting Plants and completing the design
You have worked through the design process and come up with a new garden plan that represents your preferred designs. For the most part, you have not yet chosen plants to fill the areas within the garden plan.
Now it is time to begin to add these plant names into your plan. Peruse garden books, magazines, and the internet to find plants that have the forms and shapes that you have designed into your preliminary design. Select your plants based upon these forms, but also ensure that as you work through this stage of the design that you select these plants based upon your personal likes and dislikes, plant forms, plant textures, seasonal foliage colors and flower colors, fruit, bark and mature sizes.
All of these factors should affect your plant choices. Remember always to be thinking about the basic design principles as you select plants, choosing plants that have the best characteristics to meet a particular design need.
Your final plan should include both the drawing, perhaps redrawn at least one more time, and a list of plants or final key for the drawing. This key should include the botanical (Latin) names and the common plant names, as well as a column that identifies the primary reasons for your plant choice, whether it be the form, color, shape, texture or value. This will allow you to easily substitute plants later if needed, when you are shopping for your plants.
Some of you will just not be comfortable creating your own designs. I do suggest you try, since you never know what you can accomplish if you do, but if you do prefer, there are other options available that can be reasonably inexpensive.
Now that you have a final design, how should you use it?
It is a guide.
As you begin to purchase plants, you may find some are not available. Consult your guide (the design plan) for the key characteristics, shapes, and forms that you will need to find in a substitute plant. As you plant, you will find that what looked “right” on paper, may not translate perfectly to the garden. Do not be the slave of the paper design. Adjust the plant one way or the other, move it to another location, or substitute a different plant as you discover the need to do so during your installation process. Just remember to compensate within the design, honor your original intent in regard to form, shape, height or spread, and the design will be beautiful!
