The Landscape Planning Process
Defining Your Goals

The first and most important part of the Landscape Planning Process is to wait.
Yes. I said wait!
Assessing your site well underscores your ability to create a beautiful and functional design more than any other task in the design process. These planning tasks will help you begin to understand the canvas that you are going to be working with.
Landscape Planning Process
The landscape planning process is a methodical, though not necessarily sequential, process. It is important to methodically work through each planning step. At every point along the way to check your work against the true design authority, Mother Nature!
Mother Nature includes your inner world as well. Successful garden designs can have a dramatic effect upon your ability to use the garden in your daily life. Your needs and desires are part of that package.
Still, think long and hard before going too much against the grain of Mother Nature in your landscape planning. It is much more difficult to pull off a great design if you are going against nature. We cannot second guess her successfully for very long, so the garden design must acknowlegde and adapt to our site and climate. Many a beautiful plant has bought the farm because its human host was in denial!
This is YOUR design. It must please YOU. YOU live in it and others drive by it.
Plan for what you need and adjust the plan to the environment. Don’t plan to put in banana trees if you live in Alaska! Get rid of the things that are unneeded or unheeded, and replace them with the things that meet your needs.
You are the king or queen of your domain! EVERY part of your design should reinforce the goal of providing a place for YOU to live. By forcing yourself to answer a few important questions first, you will vastly improve the probability of success in your landscape planning.
Do not skip the assessment step!
It is best to wait and understand the entire design before turning the first spade full of dirt. Planting before you know where you are headed is like baking a cake before you put anything in the cake pan except the butter stick! If you walk down that road, you will either waste money or fall short of your finest design possibilities.
Take a look at your surroundings while you are studying your landscape planning opportunity! One of the fatal mistakes we can make in landscape planning is to forget to take the time to understand our surroundings.
I call this defining the “sense of place”. It is capturing the spirit of the land you’ve been deposited on, and identifying its disposition. The most successful designs incorporate these free elements. Finding the existing energy in the space is a fundamental step toward a garden that WOW’s your visitors and makes you feel at home. This can, at times, be a long process!
There are many questions to ask, and some of them will not be answered until all four seasons have passed! In our world of instant gratification, it takes real discipline to wait for Mother Nature to instruct us. She shares with us the answers to a myriad of questions.
What is the soil like? How does the light fall? Which direction does the sun come from? Which way is north, which way is south? Where are the shadows, what stays in the sun? What are the garden boundaries? Where are there some special plants that might be destroyed in haste?
Discover the interesting characteristics in the neighbors’ garden, or the tall trees along the horizon. Take notes. And then…
Include these things in your design!
They are FREE!

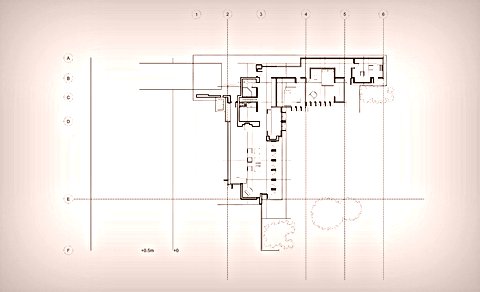
Now it is time to capture those features on paper! Your base plan doesn’t have to be fancy. It just has to be to scale. To accurately represent the existing landscape, you will need to measure the major elements of your surroundings and place them in scale on a drawing.
To start this process, all you need is a notebook, which we will dub your Landscape Planning Notebook, and paper! Quad paper is ideal, but this can be done with nothing fancier than a blank sheet of paper and a pad of tracing paper.
You may want to take notes first, and come back later to do your scale drawing.
I’ve listed below some of the most important things to capture as you begin the drawing process.
- Note all buildings and outbuildings, including your existing home.
- Map existing accesses that you would like to keep, including paths, driveways, entrances and exits to the property and to the house.
- Capture the existing hardscape (patios, walls, and other “hard” surfaces) that you would like to keep in the new design.
- Place major items, such as large trees or rock features you will be keeping, and existing fences or other boundaries if they are to be kept.
- Place the water sources that will allow you to maintain the garden.
- Capture aspects of the surroundings that will affect your design, such as ugly views, large buildings, neighboring walls, and other gems in the rough.
- Note the general rise and fall of the land, what’s up, what’s down, what’s all around? Are you on the beach? Is your property nestled at the foot of a majestic mountain? Do you have a commanding view of the city?
Now set these down in your notebook or on your base plan. It is important to remember that while the base drawing must be to scale in the end, it does not have to be perfect. This provides you the basic tool upon which you will build your new design during the landscape planning process. It need only be representative in regard to line and form. What is most important is that the measurements are accurate at this stage.

If you haven’t done so before, take a new look at your surroundings.
- What are the undesirable aspects of your surroundings? What do you want to cover up or disguise?
- Where are you going to have to level ground, grade, or improve soil?
- What are the drainage patterns of any land that will not be disturbed? What improvements are going to be required in order to manage erosion, and guarantee that your plants are not taking a bath all winter?
- Locate the sewage and septic accesses, the utilities, electrical and fiber optic lines. Where are they, and how will you work around them?
- What type of soil do you have? What amendments will you need to add to make it fertile?
- Now it is time to take a look at the house. Where are the windows and doors? Which rooms are most used, and how do they relate to the garden? What do you want to see from your kitchen window besides the neighbors purple house?
- What is the noise level of the neighborhood? Is it quiet? Is there a freeway just over the fence? Did the local school decide to locate right beside your house?
- What are the limitations and constraints of the site? Do you have a steep hill at the front of the garden? Is there a huge gully dividing your property? Are there streams or other natural elements that will affect the design?
Note all of these in your notebook or on the base plan. This is the time to start the creative process. Imagine what solutions you might come up with using your favorite plants or features. Dream wild, and dream big. Reality can be assimilated later.
Look at garden magazines, garden books, visit garden shows, look for potential solutions to your landscape challenges. Capture these seeds of ideas in your landscape planning notebook. Remember, you are not making final decisions quite yet. You are still learning what you need.

Brainstorming Your Critical Needs and Garden Wish List
Now it is time to capture your main landscape planning objectives. You may have some great ideas, but first, make room for your needs and priorities! Committing to a final direction at this stage will likely minimize the effectiveness of your design.
I use a very specific methodology to start this process as I come up with my designs. I define first the most important daily living patterns and needs, the things that will make my garden work hard for me, as well as dazzle the eye.
I do this before I ever start making decisions about style, features or the garden wish list. I find that this works very well, because it forces me to see reality first. I can objectively fit the landscape planning around these needs. Many times, I find that these areas begin to suggest something in the way of shape or form for the future landscape planning effort.
By not jumping to conclusions first about what style or features I want my garden to express, I can listen to the garden space, and decide what is in it that needs to be expressed. This helps to integrate the design with the surroundings, a very important part of any strong landscape design.
Follow these steps to work through this process and you will easily sort through your priorities.

Step 1: Capture your daily living patterns:
- Where do I need to locate the maintenance areas? Potting benches, the compost pile, the brush pile?
- Are there pets that need to be accommodated? What are their needs? Dog runs? Areas to play? Places to deposit little gifts for you?
- What is the best place for the garbage and recycling area? Where is the closest access to the garbage pickup point? Where is the access point to bring in soil, amendments, and large plants?
- Where do I need to install storage? Is there a motor home that needs a place of rest? Power boats? Tool sheds? What do YOU need out of the garden functionally? Ignore the rest for a moment, while you list these items in your landscape planning notebook.
- How will I use this space? Do you want a Writer’s Cottage? Does the space need to handle large family gatherings? Or will it be your intimate hideaway from the world?
These questions help establish the design requirements. Of course, for many of these there may be several options. Note them all down in your notebook. You may use a sheet of tracing paper lightly taped to your scale plan to place these on your plan as bubbles of space. Using a “bubble” plan like this can help you to visualize how the functional spaces work together. Do several versions to understand what your options may be.

Step 2: Review the major use areas you desire:
Once you have captured your daily living patterns, you are able to start thinking about other things you want. What are the major design elements you would like to see? These elements further flesh out the design possibilities.
- Built in Barbecue or Outdoor Kitchen?
- An entertainment area?
- Ponds or Water features?
- Edible garden Areas?
- Lawns?
- New hardscape elements?
- Children’s play areas?
Draw these in where you think they look right spatially on the bubble diagram. Place them where you think that they meet the needs of the daily living patterns you identified earlier. Do this on your tracing paper, not on the base landscape plan. This keeps your base plan neat and useable.
Step 3: Develop your Garden Wish List:
Finally, there is the garden wish list. These are the items that you would like to see in your garden that will add pizzazz to the other items identified in the two lists above. These items are the icing on the cake. What are they? You may not want to put these items on your bubble diagram yet, but note them in your landscape planning notebook.

- Specific Perennial or Annual beds?
- Special Plants or Trees?
- Graveled areas?
- Additional garden seating or other relaxation spots?
- Rock Gardens or additional water features?
- Wildlife areas?
- Garden Structures?
NOW you can begin the process of deciding on the overall picture!
What do these needs and priorities most suggest? What garden style suits the site requirements, and also speaks to you? What outdoor lighting might you want to see? Do you want to plan for year round interest or seasonal display?
Begin playing with your pencil, drawing in lines and geometric shapes, curves and hills where you think they may round out the design. Capture ideas in your landscape planning notebook. At this point, you are making no commitments. Anything can be changed easily, by redrawing the basic elements above on an overleaf of your base plan.
You are not done yet! No final decisions yet, right? You are still deciding on what you need and want!

Up until now, you’ve thought about how you would like your garden to be in a perfect world. We do not, however, live in a perfect world, do we? Look at the world of landscape planning possibilities and measure them against the constraining factor – the budget!
Whether you have a large budget or a teeny tiny budget, you can still dream. That much is free! And you would be surprised at how far a tiny budget can go, with a little patience.
So use several mental filters to help make your landscape planning decisions. Following are some of the questions you might ask to help winnow out those things you are most willing to give up. Don’t stop with these! Ask whatever questions you need to ask in order to establish what must be present in your final plan, and how much it will cost.
- What do you want to see more than any other factor in your landscape? From your list, determine which things you really desire most. Keep these.
- Which things in your list of possibilities are somewhat negotiable? If they are negotiable, set them aside for the moment.
- Which things are most important to make the garden comfortable for you? That doesn’t mean most beautiful, it means most comfortable! These are ideas you do not want to sacrifice. Keep them in your landscape planning quiver.
- What site constraints do you have? Can you adapt to them, or do you feel you need to change them? If they are prohibitive in cost to you, then accept them. These are opportunities in disguise!
- How long are you willing to wait for your garden to be complete? (Is it ever?!) 5 years? 10 years?
- Decide who will level the earth. Will it be you, or some poor unfortunate waif from the side of the road?
Research, research, research! The answers to these questions help to establish your budget, and the questions we answered in Step 1 related to maintenance, storage and use will form the foundation of your design whether the garden area is large or small, the budget adequate or currently inadequate. These form the skeleton of your landscape planning design.
The major design elements such as patios, ponds and lawns form the muscles of the garden, and that precious garden wish list is the outer skin that brings beauty to the functional space. The garden is not fully formed without any of these elements. Research some more! Determine the costs of each desired element. Get estimates if necessary. Then begin trimming and adjusting your plan (on that overlay sheet!) until you begin to find a design that pleases you and that you feel is manageable given the budget you have allocated.
However, do not trim everything just because today’s budget cannot support putting in the garden overnight! Remember, it can happen over years. Many the beautiful gardens that began over twenty years past.
Obviously, if you have 500 dollars to spend on the landscape, you will not want to plan 100,000 dollar garden revamps. But you can still plan for the future. A garden goes in a little at a time. The best gardens change over time.
So recognize that you should plan for more than you might see as possible today. 500 dollars can create an extraordinary garden with a little creative planning. And 500 dollars does not have to be spent all at once. It can be spent 60 dollars at a time! So dream big.
Now that you understand these tradeoffs, it is time to begin doing your preliminary design!
(Related: Landscape Grading)
